.png)
Introduction
In this article, we will walk you through for installing any Linux Distro in VirtualBox. Maybe you are installing different Distro but steps are mostly same. In our case, we are installing Ubuntu 22.04.3 in Oracle VM VirtualBox. While Installing Linux in VirtualBox, you might get some errors and issues with your computer but don't worries, we will cover everything from beginning and still if you have confusion, I would recommend to watch the below videos.
Prerequisites
There are some requirements before installing Linux in VirtualBox, please check the below requirements:
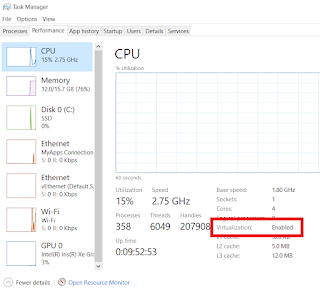
#1: Virtualization should be enable before installing Oracle VirtualBox and you can easily check from task manager. If it is not enable then follow this article: Click Here
Download VirtualBox
Once you have checked all perquisites, you can download VirtualBox from the official website. VirtualBox will help to create Virtual Machine in your Host machine, which means you can run multiple Operating System on your Laptop.
Download from the official website: https://www.virtualbox.org/wiki/Downloads
Follow the Manual for installing VM BOX: User Manual
Download Linux Distro ISO
Once you have successfully Installed VirtualBox then you have to install ISO file of your Distribution from their official website. In our case, we are installing Ubuntu, you can follow the steps.
Download Ubuntu ISO: https://ubuntu.com/download/desktop
Setup your Linux
#1: Launch your VirtualBox and click on "New" icon.
#2: Enter anything in name which will reflect as Hostname of the machine and locate the ISO file and mention the path in the ISO Image.
#3:Setup your Username and Password for login into machine.
#4 Allocate the Hardware Usage for VM, minimum 2 GB required.
#5 System starts rebooting itself and will update all the packages.
Update and Upgrade your Linux
Once you have successfully installed Linux, it's time to manually check the Firmware and packages upgrade.
#1: Launch the terminal.
#2: Run the below command for updating packages and upgrading Linux core.
sudo apt-get update && apt-get upgrade -y
Fix Screen Resolution
Once you have successfully update your Linux, now we have to fix Screen Resolution. this is optional if you don't have issue with full screen then you can skip this part.
#1: Click on above Devices icon and then click on Insert Guest Additions CD image.
#2: Then click on CD icon.
./autorun.shFix Sudoers File in Ubuntu.
su root
"your_username" ALL=(ALL:ALL) ALL
exit


